
Table of Contents
- Step 1: Assess Your Water Exposure and Moisture Needs
- Step 2: Understand Porcelain vs Ceramic Tile for Bathrooms
- Step 3: Prioritize Slip-Resistant Bathroom Floor Tile
- Step 4: Select the Right Bathroom Floor Tile Sizes
- Step 5: How to Measure a Bathroom Floor for Tile
- Step 6: Choose Your Color Palette, Pattern, and Layout
- Step 7: Plan Your Budget and Installation Details
- Frequently Asked Questions
Last Updated: October 17, 2026
Step 1: Assess Your Water Exposure and Moisture Needs
When you choose bathroom floor tile, the first step is understanding how much water your floor will encounter. Bathrooms vary wildly in moisture levels. A powder room gets occasional splashes. A shower floor takes constant water exposure.
Start by identifying your specific situation. Will this tile surround a tub? Will it be the shower floor itself? Is it in a half-bath that rarely gets wet?
Water absorption matters more than most homeowners realize. Some tiles drink water like a sponge. Others repel it completely. In wet bathroom environments, the wrong choice leads to mold, mildew, and structural damage behind the walls.
Here's what to evaluate:
- Direct water zones: Shower floors, tub surrounds, and areas directly exposed to spray need maximum water resistance
- Splash zones: Walls around sinks and tub edges get regular moisture but not constant submersion
- Dry areas: Bathroom floors away from fixtures can handle more moisture-sensitive materials
- Ventilation quality: Poor ventilation means you need more water-resistant tile; good ventilation gives you more flexibility
Water resistance is the foundation of a bathroom tile project that actually lasts.
Step 2: Understand Porcelain vs Ceramic Tile for Bathrooms
Porcelain tile is denser and absorbs less water than ceramic tile. This fundamental difference shapes everything about how these materials perform in bathrooms.
Ceramic tile is made from clay fired at lower temperatures. It's more porous, meaning it soaks up water more readily. Porcelain tile is fired at higher temperatures, creating a harder, less porous surface.
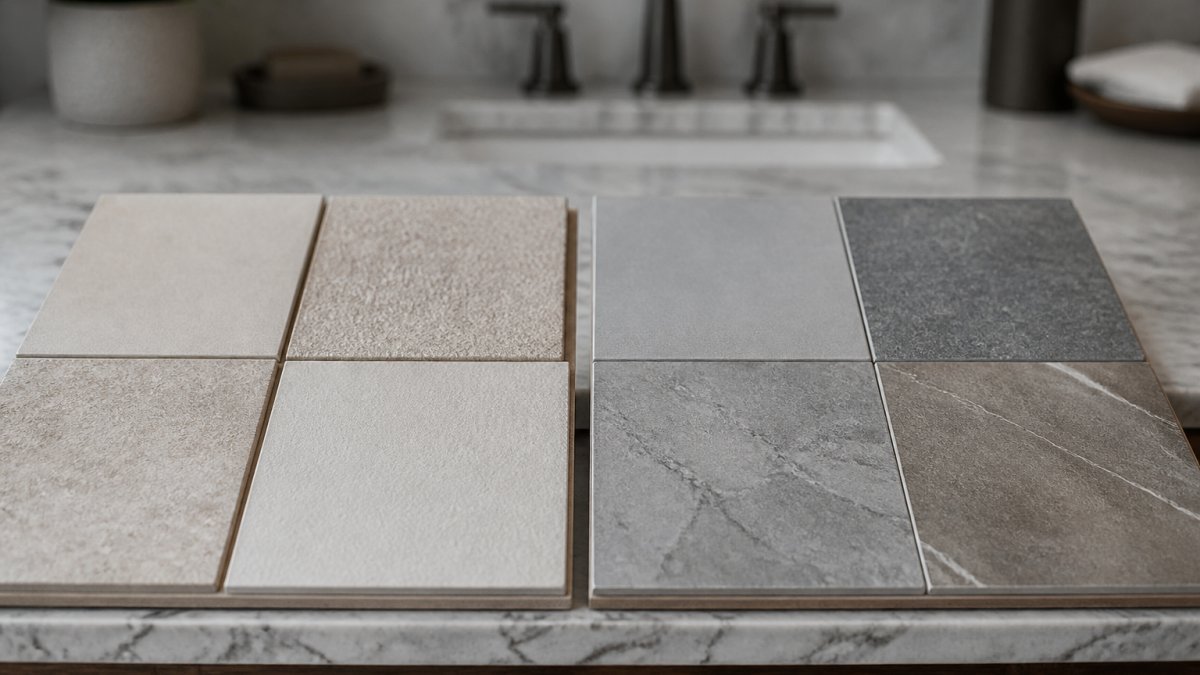
When comparing these materials for bathroom use, consider these factors:
- Water absorption: Porcelain absorbs less than 0.5% of its weight in water; ceramic typically absorbs 3-6%. For shower floors and tub surrounds, porcelain wins decisively
- Durability: Porcelain resists chipping, cracking, and staining better than ceramic. Bathrooms with kids or high traffic benefit from porcelain's toughness
- Cost: Ceramic costs less upfront. Porcelain costs more initially but lasts longer, making it better value over time
- Slip resistance: Both come in slip-resistant finishes. Porcelain's hardness actually makes it easier to create genuinely slip-resistant surfaces
- Installation: Ceramic is easier to cut and install. Porcelain requires specialized tools and skilled installation
Natural stone tile (slate, granite, marble) offers beauty but requires more maintenance and sealing. It's porous and needs regular treatment to resist water and staining. For busy family bathrooms, it's often more trouble than it's worth.
Step 3: Prioritize Slip-Resistant Bathroom Floor Tile
Slip resistance on bathroom floor tile is a safety issue, not a luxury feature. Wet floors are slippery. The wrong tile creates a hazard for kids, elderly family members, and anyone with mobility challenges.
Slip resistance is measured by the Coefficient of Friction (COF). Higher numbers mean more grip. For bathroom floors, look for tiles rated 0.60 COF or higher. For shower floors specifically, 0.75 COF or higher provides meaningful safety.
Here's how to evaluate slip resistance when you choose bathroom floor tile:
- Textured surfaces: Matte finishes grip better than glossy ones. Look for tiles with visible texture or subtle dimpling
- Glazed vs. unglazed: Unglazed tile naturally resists slipping better. Glazed tile can be slip-resistant if textured properly
- Grout texture: Rough grout lines add grip. Smooth grout is slippery. Consider this when planning your layout
- Cleanliness: Even slip-resistant tile becomes hazardous when soapy. Choose tile that doesn't hide soap residue visually
- Manufacturer ratings: Ask your supplier for COF ratings. Reputable tile makers provide this data
Natural stone like slate inherently offers good slip resistance due to its textured surface. Porcelain and ceramic can be manufactured with slip-resistant finishes. The key is asking for this feature specifically when you shop.
Step 4: Select the Right Bathroom Floor Tile Sizes
Tile size affects how your bathroom looks and how easy it is to install. Larger tiles create an open, spacious feel. Smaller tiles work in tight spaces and can hide imperfect subfloors.
Common bathroom floor tile sizes range from 1-inch mosaics to 24-inch large-format tiles. Most bathrooms use 12-inch, 18-inch, or 24-inch tiles as their primary choice.
Here's how different sizes affect your bathroom:
- Small tiles (1-12 inches): Create visual interest and work in small bathrooms. They require more grout lines, which means more maintenance. Mosaics and tiny tiles look detailed but are labor-intensive to install
- Medium tiles (12-18 inches): Strike a balance between visual impact and installation simplicity. They work in most bathroom sizes and look contemporary without appearing too trendy
- Large tiles (18-24+ inches): Create a seamless, modern look. They make small bathrooms feel bigger. They require a perfectly level subfloor and are harder to cut around fixtures
- Rectangular tiles: Add visual direction and can make narrow bathrooms feel wider. They're particularly effective in long, thin spaces
The layout matters as much as the size. A 12-inch tile laid in a straight grid looks clean and timeless. The same tile laid in a diagonal pattern adds visual energy.
Consider how your tile choice coordinates with your bathroom's other elements. Large tiles work well with minimalist design. Small tiles pair naturally with traditional or eclectic styles.
Call the Expert Renovation Contractors Now →
Step 5: How to Measure a Bathroom Floor for Tile
Accurate measurement prevents waste, ensures proper ordering, and helps you visualize the final layout. Measure twice, order once.
Start with the basic floor dimensions. Measure the length and width of your bathroom floor in feet. For irregular shapes, break the space into rectangles and measure each section separately. Write down every measurement.
Here's your measurement process:
- Measure length and width of the main bathroom floor area in feet and inches
- Note obstacles: Measure around toilet flanges, vanity bases, door frames, and any other fixtures
- Calculate square footage: Multiply length by width. For example, a 8-foot by 10-foot bathroom is 80 square feet
- Add 10-15% waste: Tile breaks during cutting and installation. Order extra to account for this
- Create a rough layout sketch: Draw your bathroom to scale and sketch your tile pattern. This shows you how tiles will fit around fixtures
- Identify cut lines: Mark where you'll need to cut tiles to fit around the toilet, vanity, or doorway
Most tile suppliers can help you verify your measurements and calculate the exact quantity you need. Bring your sketch and measurements to their showroom. They'll catch errors before you buy.
Step 6: Choose Your Color Palette, Pattern, and Layout
Color, pattern, and layout transform your bathroom from functional to beautiful. These choices determine the room's personality and how it coordinates with your overall design vision.
Start by considering your bathroom's existing elements. What color is your vanity? Your walls? Your fixtures? Your tile should either complement these colors or deliberately contrast with them. Both approaches work, the key is intentionality.
Here's how to approach color and pattern selection:
- Neutral palettes: White, gray, beige, and soft taupe tile work with almost any bathroom design. They're timeless and won't feel dated in five years
- Bold colors: Deep blues, blacks, and jewel tones create drama. Use them as accents or in smaller bathrooms where they feel cohesive rather than overwhelming
- Patterns and textures: Geometric patterns, wood-look tile, and stone textures add visual interest. Avoid trendy patterns that feel dated quickly
- Grout color: Dark grout hides dirt but emphasizes tile lines. Light grout feels seamless but shows stains. Medium gray is practical and attractive
- Grout width: Narrow grout lines (1/8 inch) create a seamless look. Wider grout lines (3/16 to 1/4 inch) are easier to maintain and more forgiving during installation
Layout choices include straight patterns (the most common), diagonal layouts (adds movement), herringbone (creates visual flow), and mixed-size layouts (adds complexity and interest).
Consider your bathroom's size when choosing layout. Small bathrooms benefit from simple, straight layouts that feel orderly. Larger bathrooms can handle more complex patterns without feeling chaotic.
Step 7: Plan Your Budget and Installation Details
Budget planning prevents surprises and keeps your project on track. Bathroom floor tile costs vary dramatically based on material quality, tile size, and installation complexity.
When budgeting for bathroom floor tile, account for these components:
- Tile material: This is your primary cost. Quality varies by brand and style
- Grout and sealant: Budget for grout, grout sealer, and tile sealer if needed
- Installation labor: Professional installation costs depend on complexity, location, and local rates
- Subfloor preparation: If your existing floor needs leveling, waterproofing, or repair, add this cost
- Removal of old tile: If replacing existing tile, removal and disposal add to the project cost
- Fixtures and trim: Edge trim, corner pieces, and transition strips have separate costs
Get quotes from multiple contractors before committing. Ask each contractor to break down their estimate into material and labor components. This helps you understand where your money goes and compare quotes fairly.
Installation details matter as much as material selection. Your installer should:
- Properly prepare and level the subfloor
- Apply waterproofing membrane in wet areas (shower floors, tub surrounds)
- Use appropriate thinset mortar for your tile type
- Space grout lines consistently
- Seal grout after installation (for most tile types)
- Allow proper curing time before using the bathroom
A beautiful tile project only stays beautiful if the foundation is solid.
Choosing bathroom floor tile involves balancing water resistance, safety, durability, and design. The process feels overwhelming at first, but breaking it into these seven steps makes it manageable. Start with your water exposure needs, understand your material options, prioritize slip resistance, and plan your layout carefully.
Frequently Asked Questions
Is porcelain or ceramic tile better for a bathroom floor?
Porcelain tile is generally superior for bathroom floors because it absorbs less than 0.5% water compared to ceramic's 3-6% absorption rate. This makes porcelain more resistant to moisture damage, mold, and staining in wet environments. Ceramic works in lower-moisture areas like powder rooms, but porcelain handles shower floors and tub surrounds better. Porcelain costs more upfront but lasts longer in high-water-exposure zones, making it the better choice for most bathroom floor applications.
What tile finish is safest for a bathroom floor?
Textured, matte, and honed finishes provide better traction than polished or glazed surfaces. Unglazed porcelain and natural stone with a rougher surface texture are excellent safety choices. Avoid high-gloss finishes in wet areas, as they become slippery when wet. Test samples on your bathroom floor when wet before committing to a material.
What size tile works best in a small bathroom?
Smaller tiles (4x4 inches to 8x8 inches) or medium tiles (12x12 inches) work well in compact bathrooms because they create visual breaks that make the space feel larger and less cluttered. Large-format tiles (18x18 inches or bigger) can overwhelm a small bathroom and require more grout lines to cut around fixtures. Consider the layout: smaller tiles allow for better drainage patterns on shower floors and more flexible placement around pipes and transitions. Medium tiles offer a balance between visual appeal and practical installation.
How much extra tile should you buy for a bathroom floor?
Purchase 10-15% extra tile beyond your calculated square footage to account for cuts, breakage, and future repairs. For complex layouts with many angles or small spaces, add 15-20%. Keep extra tiles in a safe, dry location for at least one year after installation, as dye lots vary and replacement tiles may not match perfectly if ordered later. Ask your supplier about their return policy; some allow returns of unopened boxes within a set timeframe.
Comments