
Table of Contents
- Why Waterproofing a Shower Niche Matters
- Prepare the Niche: Framing, Inspection, and Surface Setup
- Selecting the Right Shower Niche Waterproofing Membrane
- Apply Waterproof Membrane in Multiple Coats
- Seal Niche-to-Wall Seams and How to Waterproof Shower Niche Corners
- Prefabricated Waterproof Shower Niche Installation
- Common Shower Niche Waterproofing Mistakes to Avoid
- Inspect and Test Before Tiling
- Frequently Asked Questions
Last Updated: October 20, 2026
Why Waterproofing a Shower Niche Matters
Water damage in a shower niche can destroy your bathroom fast. A small leak behind tile spreads into framing, insulation, and drywall. Within months, you're facing mold, structural rot, and expensive repairs.
We've seen countless bathroom renovations fail because homeowners skipped proper waterproofing or used the wrong system. The good news: when you do it right, your niche stays dry for decades. The bad news: shortcuts cost thousands in water damage later.
Understanding how to waterproof a shower niche comes down to three things: surface prep, the right membrane system, and sealing every seam and corner.
Prepare the Niche: Framing, Inspection, and Surface Setup
Before you apply any waterproofing membrane, your niche has to be ready. A weak foundation ruins everything that comes after.
Check framing and niche box integrity
Start by inspecting the framing behind your niche opening. Look for soft spots, rot, or water stains on the wood. Press the studs with a screwdriver.
Check that your niche box is square and level. Use a level on all sides. If it's crooked, water will pool in low spots and find its way through cracks. Adjust framing now rather than dealing with leaks later.
Verify that the niche is properly attached to the wall studs. It should be solid with no movement when you push on it. Loose niches shift during installation and break seals.
Install backer board or waterproof substrate
Never use standard drywall in a wet area. Drywall absorbs water and falls apart. Use cement backer board, fiber cement board, or waterproof substrate designed for wet areas.
Cut your backer board to fit the niche opening snugly. Screw it to the framing with corrosion-resistant screws spaced every 8 inches. Do not use nails. Nails work loose over time as the material expands and contracts.
Cover all screw heads with waterproof caulk or sealant. Exposed fasteners are entry points for water. The substrate itself is your first water barrier, but it's not waterproof on its own, you need a membrane on top.
Selecting the Right Shower Niche Waterproofing Membrane
The membrane you choose sets the standard for your entire niche. Pick the wrong one and you'll fight water problems forever.
Bonded vs. unbonded membranes
Bonded membranes stick directly to the substrate. They create a continuous seal with no gaps. Most residential installations use bonded systems because they're reliable and easier to apply.
Unbonded membranes sit on top of the substrate without adhesive. They're typically used in commercial settings or under heavy-traffic areas. For a shower niche, bonded is your better choice.
Check the manufacturer's instructions for the specific membrane you're using. Some membranes require a primer on the substrate first. Others bond directly to clean, dry surfaces. Following the system exactly prevents compatibility problems that cause failure.
Liquid-applied vs. sheet membrane systems
Liquid-applied membranes come as a thick paste or liquid you brush or roll onto the surface. They're flexible, easy to work into corners, and they cure to form a seamless barrier.
Sheet membranes are pre-made rolls you unroll and adhere to the substrate. They're faster on large flat surfaces but harder to work into inside corners and seams. Sheet systems are common in commercial work but less practical for a small niche.
For a shower niche, liquid-applied membrane gives you better control and fewer weak points. You can work it into every corner and overlap seams without gaps.
Apply Waterproof Membrane in Multiple Coats
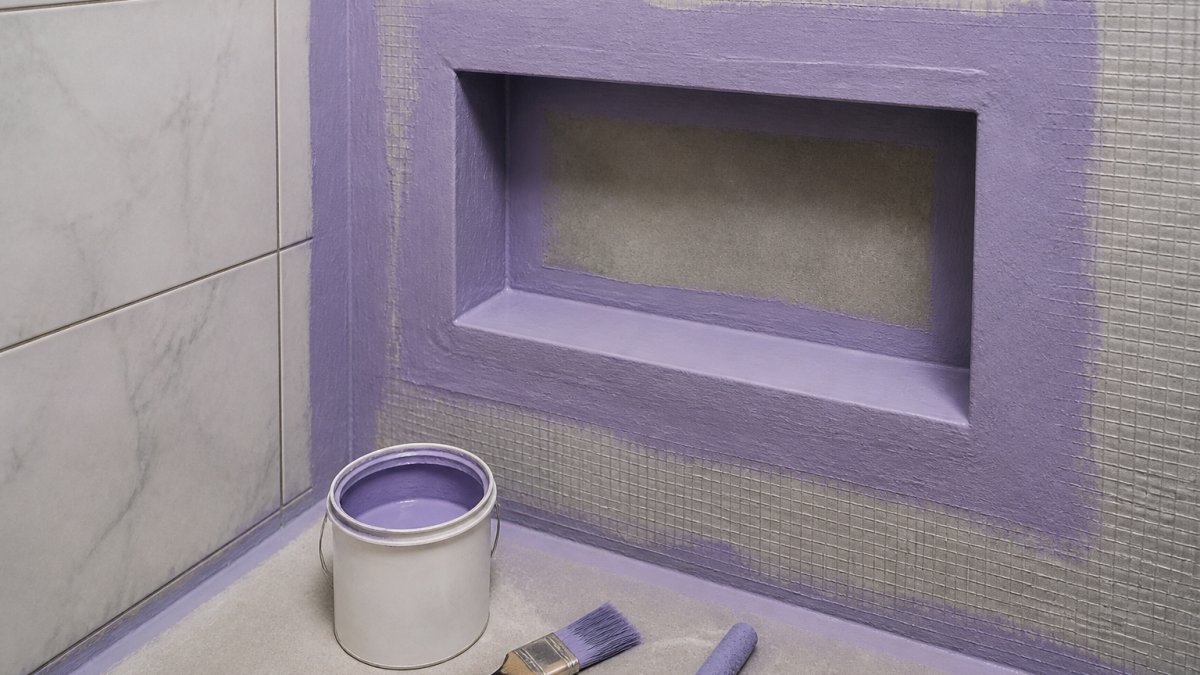
One coat of membrane is not enough. Water finds thin spots and seeps through. Two full coats with proper cure time between them is the standard that works.
First coat application and cure time
Mix or prepare your membrane according to the manufacturer's instructions. Use a brush or roller to apply an even coat across the entire niche, back wall, sides, and shelf if your niche has one.
Work the membrane into corners with a brush. Don't rush. Press it firmly into the seams where the walls meet. Thin spots are failure points.
Let the first coat cure fully before applying the second. Most membranes need 24 hours, but check your product. Applying the second coat too early traps moisture and weakens the bond. Patience here saves you from callbacks.
Second coat and full coverage verification
Apply the second coat perpendicular to the first if possible. This ensures complete coverage and catches any thin spots the first coat missed. Use the same technique: work the membrane into corners and seams with firm brush strokes.
Once the second coat is dry, inspect the entire niche. Look for thin areas, drips, or bare spots. The membrane should look uniform in color and thickness. If you see light patches or areas where the substrate shows through, apply a third coat to those spots.
Don't skip this verification step. It's the difference between a niche that leaks in year two and one that stays dry for twenty years.
Seal Niche-to-Wall Seams and How to Waterproof Shower Niche Corners
Seams and corners are where most leaks start. Water follows the path of least resistance, and gaps in seams are easy targets.
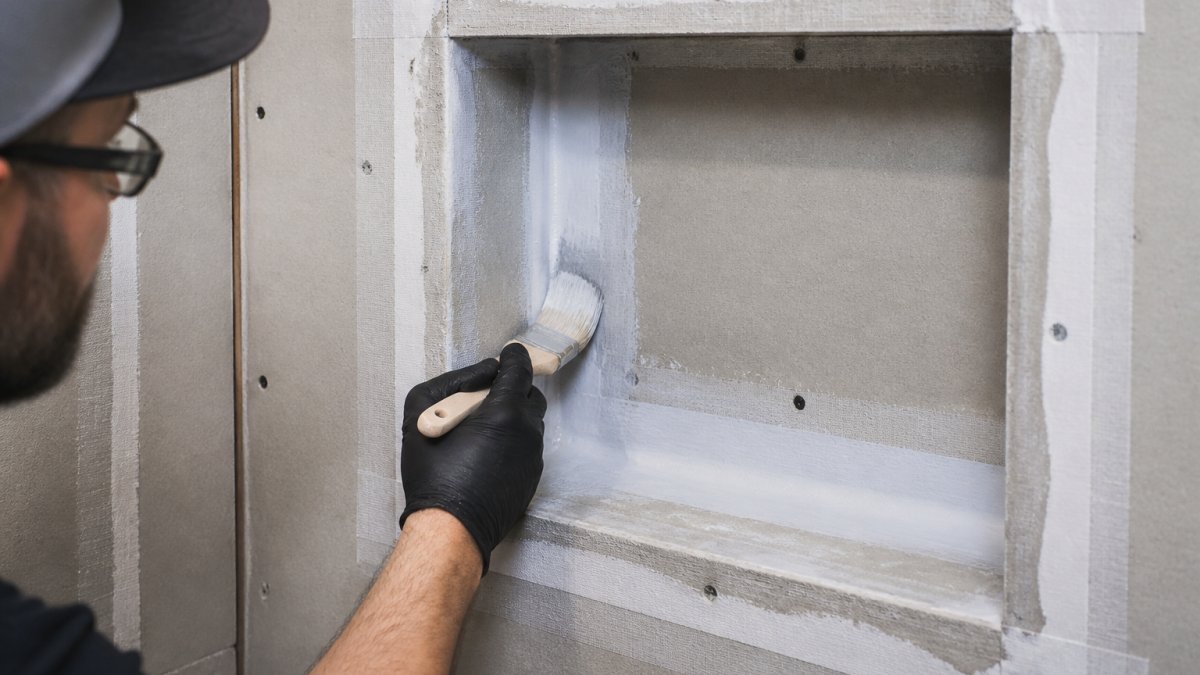
Using corner strips and reinforcing tape
Corner strips and reinforcing tape are fabric strips embedded in the waterproof membrane. They reinforce weak points and prevent cracks from forming where walls meet.
Cut corner strips to length and center them in the inside corners of your niche. Apply a layer of membrane over the corner strip, then apply another layer on top. The strip becomes a reinforced sandwich that flexes without cracking.
Use reinforcing tape along any seams where two pieces of backer board meet. These joints are stress points that move slightly as the building settles. Tape prevents the membrane from cracking along the seam.
Call the Expert Renovation Contractors Now →
Sealing inside corners and joints
Inside corners need extra attention. Water collects in corners and pushes against seams. A single layer of membrane in a corner will eventually fail.
Build up the membrane in corners with extra coats. Apply three thin coats to inside corners instead of two. Each coat should be worked deep into the corner with a brush.
At joints where the niche meets the surrounding shower wall, use waterproof caulk or sealant rated for wet areas. The membrane creates the primary barrier, but caulk seals the transition where the niche box ends and the shower wall begins. This prevents water from creeping around the edge of the niche.
Prefabricated Waterproof Shower Niche Installation
Some homeowners choose prefabricated niches that come with waterproofing built in. These are a valid shortcut if you're starting from scratch.
Prefabricated niches are typically made from solid surface material, acrylic, or fiberglass. They arrive as a complete box ready to install.
The trade-off is cost. Prefabricated niches cost more than framing and waterproofing a basic niche yourself. But they're faster and eliminate the risk of improper membrane application.
If you use a prefabricated niche, the sealing work shifts to the edges.
Follow the manufacturer's installation instructions exactly. Most prefabricated niches have specific requirements for fastening, spacing, and sealing that affect the warranty.
Common Shower Niche Waterproofing Mistakes to Avoid
Mistakes in waterproofing are expensive. Here's what goes wrong and how to prevent it.
Skipping surface preparation
The biggest mistake is rushing into membrane application without proper prep. Dirty, wet, or uneven surfaces prevent the membrane from bonding. It sits on top like paint on a dusty wall and peels away.
Clean the backer board thoroughly. Remove dust, debris, and any loose material. Let the substrate dry completely. Moisture under the membrane traps air bubbles and weakens adhesion.
Sand rough areas smooth so the membrane makes full contact. This step takes an hour but saves you from a failed waterproofing job.
Confusing waterproofing with caulk or sealant
This is a critical distinction. Waterproofing membrane is a system. Caulk and sealant are point solutions for seams and transitions.
Caulk alone does not waterproof a niche. It seals cracks and gaps but doesn't create a continuous barrier. Many homeowners apply caulk to the inside of a niche and think they're done. Water finds its way through the caulk, through the backer board, and into the framing.
Waterproof membrane is the primary barrier. Caulk supports it by sealing edges and transitions. Use both, but don't confuse one for the other.
Failing to follow manufacturer instructions and system compatibility
Every membrane system has specific requirements. Some need a primer. Others require the substrate to be damp, not wet. Application temperature matters. Cure time between coats matters.
Mixing products from different manufacturers is a common mistake. A primer from one brand may not bond properly to a membrane from another. A caulk rated for dry areas won't hold up in a wet niche.
Read the full instructions before you start. Buy all products from the same manufacturer when possible. If you must mix brands, verify compatibility on the product labels or contact the manufacturer.
Inspect and Test Before Tiling
Before you tile the niche, verify that your waterproofing is complete and properly sealed.
Inspect the entire niche for gaps, thin spots, or uncovered areas. The membrane should look uniform and complete. Run your hand over the surface.
Check all corners and seams. They should be reinforced and sealed. Look for any cracks or areas where the membrane pulled away from the substrate.
A simple water test reveals problems before tile goes down. Fill a spray bottle with water and spray the inside of the niche thoroughly.
This test catches mistakes that would cost thousands in repairs after the tile is installed. It takes 30 minutes and prevents disaster.
Waterproofing a shower niche the right way protects your bathroom for years. If you'd rather have professionals handle it, we're here to ensure your niche is waterproofed properly before tile installation. Call the expert renovation contractors now and let's get your bathroom done right.
Frequently Asked Questions
Can I waterproof a shower niche myself?
Yes, you can waterproof a shower niche yourself if you follow the proper steps and manufacturer instructions carefully. The process requires attention to detail, especially at seams and corners where water intrusion commonly occurs. Ensure you use compatible waterproofing materials, allow adequate cure time between coats, and test the membrane before tiling. If you're unsure about any step, consulting a professional is wise to avoid costly water damage repairs later.
What's the difference between waterproofing and caulk or sealant?
Waterproofing membranes create a complete, flexible barrier across the entire niche surface that moves with the wall and prevents water intrusion. Caulk and sealant are surface treatments that fill gaps and joints but don't provide full waterproofing protection. Using only caulk on a shower niche is insufficient; it's a supplementary product. A proper waterproofing system with multiple coats, corner reinforcement, and full niche-to-wall coverage is essential for long-term protection against leaks.
How long should shower niche waterproofing dry before tiling?
Cure time depends on the waterproofing system you choose. Liquid-applied membranes typically require 24-48 hours between coats and before tile installation, while some sheet membranes cure faster. Always follow the manufacturer's instructions on the product label, as humidity, temperature, and ventilation affect drying time. Rushing this step risks incomplete curing, which compromises the waterproofing system's effectiveness and can lead to water pooling and leaks behind your tiles.
What causes shower niche leaks?
Shower niche leaks typically result from inadequate waterproofing, improper sealing at corners and seams, incomplete membrane coverage, or failure to follow manufacturer instructions during installation. Water pooling on the niche shelf indicates poor slope or drainage. Cracks in grout or caulk allow water to penetrate behind the tile. Using incompatible materials or skipping surface preparation also compromises the waterproofing system. Proper installation with multiple coats, reinforced corners, and thorough inspection before tiling prevents most leaks.