
Table of Contents
- Why Early Detection of Water Damage Signs Matters
- 7 Warning Signs of Water Damage in Homes
- How to Detect Hidden Water Leaks Behind Walls and Under Floors
- DIY vs. Professional Assessment: When to Call a Pro
- Seasonal and Climate-Specific Water Damage Indicators
- Documenting Damage for Insurance and Getting an Emergency Disaster Restoration Service Quote
- Smart Home Technology for Early Leak Detection
- Conclusion
- Frequently Asked Questions
Last Updated: September 21, 2026
Why Early Detection of Water Damage Signs Matters
Water damage rarely announces itself. A slow leak behind a wall can drip for months, and by then the repair bill has grown far beyond a simple pipe fix.
Catching water damage signs early keeps small problems small.
7 Warning Signs of Water Damage in Homes
These seven signs cover the most common ways water damage shows up. Some are obvious. Others hide in plain sight.
Musty Odors and Damp Smells
A musty smell is often the first clue that moisture is trapped and mold is growing. If a room smells damp even after cleaning, check nearby walls, baseboards, and closets.
Discoloration, Water Rings, and Ceiling Stains
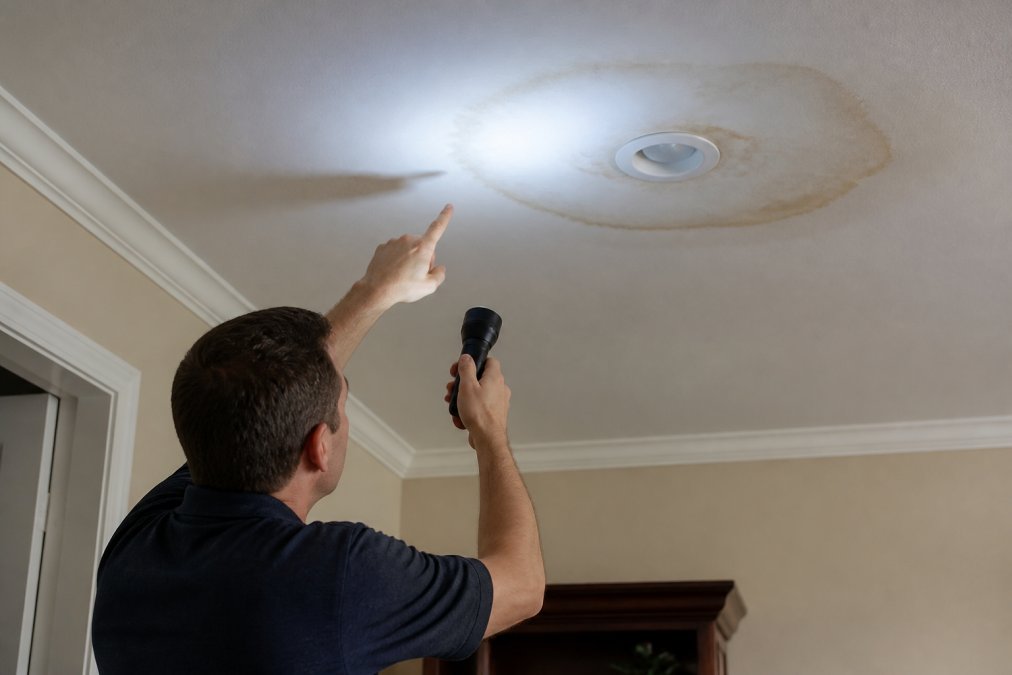
Brown or yellow rings on ceilings and walls point to water seeping from above or behind, often near plumbing fixtures or under bathrooms. Fresh stains feel damp; dry ones signal a past leak that may have returned.
Peeling Paint, Bubbling, and Swollen Drywall
Peeling or bubbling paint means moisture is pushing from behind the surface, and swollen drywall signals water has soaked in. If it feels soft or spongy, it needs attention.
Warped, Sagging, or Buckling Flooring
Wood floors warp and buckle when moisture reaches the subfloor, and tiles may lift or crack for the same reason. A floor that sags in one spot suggests long-term moisture, common near dishwashers, refrigerators, and bathroom fixtures.
Signs of Mold from Water Damage
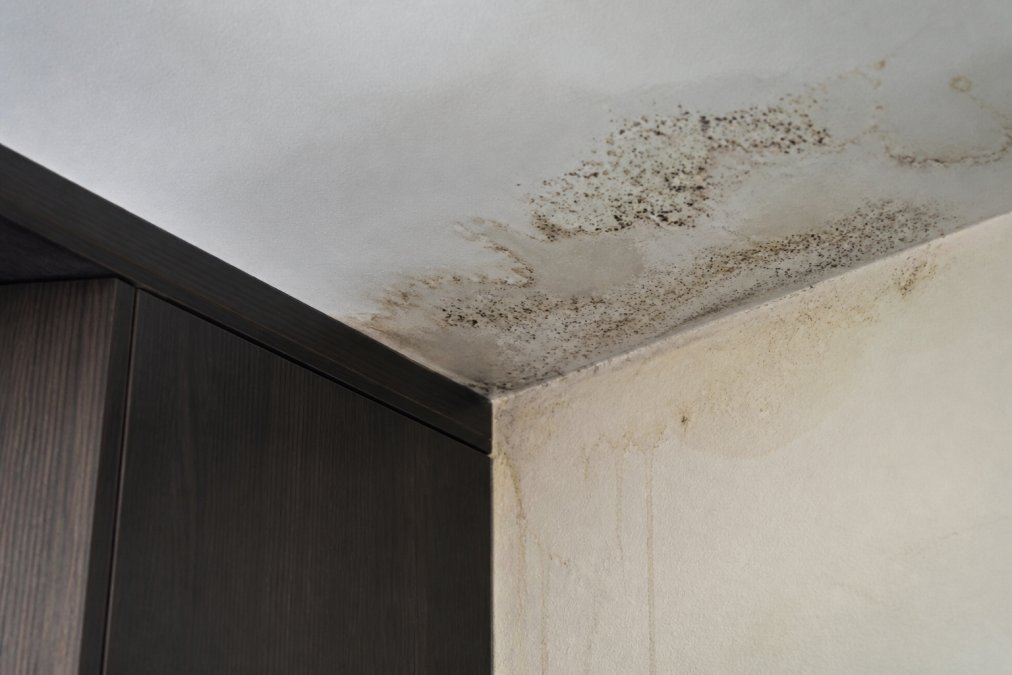
Mold from water damage often appears as dark spots or fuzzy patches on walls, ceilings, or grout, usually within days of a leak. If you see it, there's a water source nearby, even if you can't find it yet.
Structural Changes: Sloping Floors and Sticking Doors
A sloping floor or a door that suddenly sticks can signal serious trouble, water may have weakened the framing or foundation. Hairline cracks that widen over time point to ongoing seepage.
Pooling Water, Condensation, and Damp Surfaces
Puddles near appliances or under sinks are easy to spot; condensation on windows and pipes is subtler but still a warning. Damp surfaces that never dry raise indoor humidity, feeding mildew and spore growth.
How to Detect Hidden Water Leaks Behind Walls and Under Floors
Hidden leaks are the hardest to catch. Here's a simple method to detect them before they spread.
- Check your water meter. Turn off every faucet and appliance. If the meter still moves, you have a leak.
- Watch your water bill. A sudden jump with no change in habits points to a hidden leak.
- Feel for warm spots on floors. A warm patch can mean a hot water line is leaking underneath.
- Look under sinks and behind appliances. Check cabinets, dishwashers, and washing machines.
- Inspect the crawl space. Look for damp insulation, standing water, or a failing vapor barrier.
- Use a moisture meter. These tools cost little and reveal damp spots inside drywall.
DIY vs. Professional Assessment: When to Call a Pro
Most guides tell you to "call a pro if it's bad." That's not a decision. Here's a framework you can apply in the ten minutes after you spot a stain.
The 24-Hour Rule
Water damage is a clock problem, not just a size problem. Within 24 hours, materials are wet but usually salvageable. Between 24 and 48 hours, mold spores colonize porous surfaces like drywall paper, carpet backing, and wood framing. After 72 hours, structural swelling and microbial growth expand the repair scope fast.
What You Can Realistically Handle Yourself
DIY is appropriate when all four of these are true:
- The source is visible and accessible. A dripping supply line under a sink, a loose compression fitting, a failed toilet wax ring, a leaking dishwasher door gasket.
- The affected area is small and non-porous. Tile, sealed concrete, or a small section of painted wall where the moisture hasn't wicked into the cavity.
- You can dry it within 24 hours. Box fans and a dehumidifier running continuously will handle surface moisture. A wet-dry shop vac handles standing water under an inch.
- There's no electrical, gas, or sewage involvement. Water near outlets, a panel, a gas appliance, or a toilet supply that backed up is never a DIY job.
What Looks DIY But Isn't
These traps each look like a small stain but are almost always a larger hidden problem:
- A ceiling stain below an upstairs bathroom. Water travels along joists before it drips, so the visible ring is rarely above the actual leak. The wet area is often several feet away and inside the ceiling cavity.
- A soft or spongy spot in drywall. Once drywall paper is saturated, it loses structural integrity and becomes a mold food source. Cutting out and replacing the section is the correct fix, patching over it traps moisture.
- A warped hardwood floor with no visible water. Wood cups and crowns when moisture reaches the subfloor from below. The source is usually a slow supply or drain leak in the wall or slab, not a spill.
- A musty smell with no visible stain. Odor means active microbial growth somewhere you can't see. Air sampling or thermal imaging is needed to locate it.
- Any stain that reappears after you paint over it. Paint is not a moisture barrier. If a stain bleeds back through, water is still migrating.
What a Professional Assessment Actually Involves
A qualified restoration professional doesn't just look at the stain. The standard assessment includes:
Call the Expert Renovation Contractors Now →
- Moisture mapping. Pin-type and pinless moisture meters read moisture content at multiple depths and points, producing a map of the wet zone that's often two to three times larger than the visible damage.
- Thermal imaging. Infrared cameras reveal temperature differentials caused by evaporating moisture inside walls and ceilings, useful for finding the source of a ceiling stain without opening the whole ceiling.
- Cavity inspection. A small inspection hole or borescope camera confirms whether insulation and framing are wet behind intact drywall.
- Source confirmation. Pros trace the leak to its origin, a failed fitting, a cracked drain line, a roof penetration, a foundation crack, rather than treating the symptom.
- Scope and documentation. A written scope with moisture readings, photos, and affected materials is what your insurance adjuster needs, often the single biggest reason to bring in a pro even when the damage looks minor.
A Simple Decision Checklist
Call a professional if any of these are true:
- The leak source is hidden or you can't find it after an hour of checking
- The affected area is larger than roughly a 3-foot by 3-foot section
- Drywall, carpet, insulation, or wood framing is wet or soft
- You see or smell mold, or the space has been damp for more than 48 hours
- Water is anywhere near electrical outlets, panels, or HVAC equipment
- The floor slopes, a door sticks, or you see new cracks in the foundation
- The damage followed a storm, sewage backup, or appliance failure you plan to claim on insurance
If none of those apply and you can dry the area within a day, DIY is reasonable. Document what you did and take before-and-after photos either way, you may need them later.
Seasonal and Climate-Specific Water Damage Indicators
Water damage looks different by season, and knowing what to watch for helps you catch it faster.
Documenting Damage for Insurance and Getting an Emergency Disaster Restoration Service Quote
Most homeowners file a water damage claim once; adjusters handle them daily. That asymmetry is why claims get underpaid, the documentation doesn't match what the adjuster needs. This workflow closes that gap.
Start Documenting Before You Clean Anything
The most common claim mistake is cleaning up first. Once wet drywall is in a dumpster, the adjuster can't verify the extent of damage, and the line item gets reduced or denied.
Before you move, throw away, or repair anything:
- Stop the water source if you safely can. Note the time you did.
- Photograph everything in place. Wide shots to establish the room, then close-ups of each stain, puddle, and damaged item.
- Include a reference object in at least one photo per area, a ruler, a coin, or your hand, so scale is unambiguous.
- Photograph the source if visible: the failed supply line, the cracked drain, the roof penetration.
- Take a short video walkthrough narrating what you see. Video timestamps are hard to dispute.
- Write down the date and time you first noticed the damage and the date you discovered the source, if different.
What Your Adjuster Actually Needs
A claim file that moves quickly usually contains five things:
- Proof of loss date. When the damage occurred or was discovered. This matters because most policies require prompt notice, often within a defined window after discovery, not after the event.
- Cause of loss. Burst pipe, appliance failure, storm intrusion, or seepage. The cause determines whether the loss is covered. Sudden and accidental events are typically covered; long-term seepage and maintenance neglect often are not.
- Scope of damage. Which rooms, which materials, how far moisture traveled. Moisture meter readings and thermal images are the strongest evidence here.
- Proof of ownership and value. Receipts, photos, or appraisals for damaged personal property.
- Mitigation evidence. What you did to prevent further damage, extracted water, ran dehumidifiers, called a pro. Most policies require you to mitigate, and documenting it protects the claim.
The Documentation Checklist
- Wide and close-up photos of every affected area, with a scale reference
- Video walkthrough with narration
- Written timeline: when you noticed it, when you found the source, when you stopped the water
- Moisture meter readings if you have a meter (note the date and location of each reading)
- Receipts for any emergency repairs, equipment rentals, or hotel stays
- Photos of the failed component (supply line, fitting, appliance)
- Inventory of damaged personal property with approximate age and replacement cost
- Copy of your policy's declarations page and the relevant coverage section
- Names and contact info for any contractors who inspected the damage
Keep damaged materials, a section of wet drywall, a piece of warped flooring, a stained ceiling tile, until the adjuster has seen them or explicitly released them. Store them somewhere dry and labeled.
Smart Home Technology for Early Leak Detection
Smart leak detectors catch problems before you see a stain. Placed near water heaters, under sinks, and beside washing machines, they alert your phone when they sense moisture, and some shut off the water supply automatically.
Popular options include:
| Device Type | Where It Goes | What It Catches |
|---|---|---|
| Spot leak sensor | Under sinks, near appliances | Drips and pooling water |
| Smart water shutoff | Main water line | Burst pipes, major leaks |
| Wi-Fi moisture meter | Inside walls, crawl space | Hidden dampness |
| Smart water heater monitor | Water heater tank | Slow tank leaks |
Conclusion
Water damage signs are easy to dismiss until they become expensive. A musty smell, a small stain, or a sticking floor are all worth acting on.
Frequently Asked Questions
What are the first signs of water damage in a house?
The earliest signs of water damage in homes are often a musty odor, discolored patches on walls or ceilings, and soft or warped flooring. You may also notice peeling paint or bubbling wallpaper. Catching these signs early matters because moisture intrusion can weaken structural integrity and lead to mold growth within 24 to 48 hours. If you spot any of these, act quickly to prevent the damage from spreading.
How do you check for hidden water damage behind walls?
To detect hidden water leaks, look for swollen drywall, hairline cracks, or efflorescence (a white chalky residue) near baseboards. A moisture meter can confirm elevated humidity levels inside walls. Check around plumbing fixtures, under sinks, and near the water heater. If you notice a persistent damp smell but no visible damage, a professional leak detection specialist can use thermal imaging to find the source without tearing out walls.
How quickly does mold grow after water damage?
Mold can begin growing within 24 to 48 hours after water damage occurs, especially in humid conditions. Signs of mold from water damage include dark spots, a strong musty odor, and allergy-like symptoms. Mildew and spore growth spread rapidly on drywall, wood, and insulation. If you find mold, avoid disturbing it, as that can release spores into the air. Contact a professional for safe removal and to address the underlying moisture problem.
What should I do if I find signs of water damage?
First, stop the water source if possible and document all damage with photos for insurance. Remove standing water and move valuables away from the area. Avoid using electrical outlets near wet zones. Then, contact a professional for an assessment. When requesting an emergency disaster restoration service quote, ask about water mitigation, drying equipment, and mold prevention. Acting fast reduces repair costs and protects your home's structural integrity.
Comments