
Table of Contents
- Slab Backsplash vs Tile: What Changes in a Kitchen Remodel
- Slab Backsplash Materials: Performance, Pros and Cons
- How to Match Backsplash With Countertop and Cabinets
- Kitchen Slab Backsplash Ideas for Modern and Traditional Spaces
- Measurements, Layout, and Fabrication: Full-Height vs Partial Coverage
- Installed Cost, Budgeting, and Slab Selection
- Cleaning, Sealing, and Long-Term Care by Material
- Conclusion: A Decision Checklist for Your Slab Backsplash
- Frequently Asked Questions
Last Updated: October 21, 2026
Slab Backsplash vs Tile: What Changes in a Kitchen Remodel
A slab backsplash is a single continuous panel of stone or porcelain cut to cover the wall behind your counter, rather than many small tiles set with grout lines. We walk homeowners through this decision on nearly every kitchen remodel, and it comes down to a simple trade: fewer seams and a bolder look, in exchange for tighter planning and a higher material bill.
Here is the honest version most guides skip. A tile backsplash forgives mistakes. A slab does not.
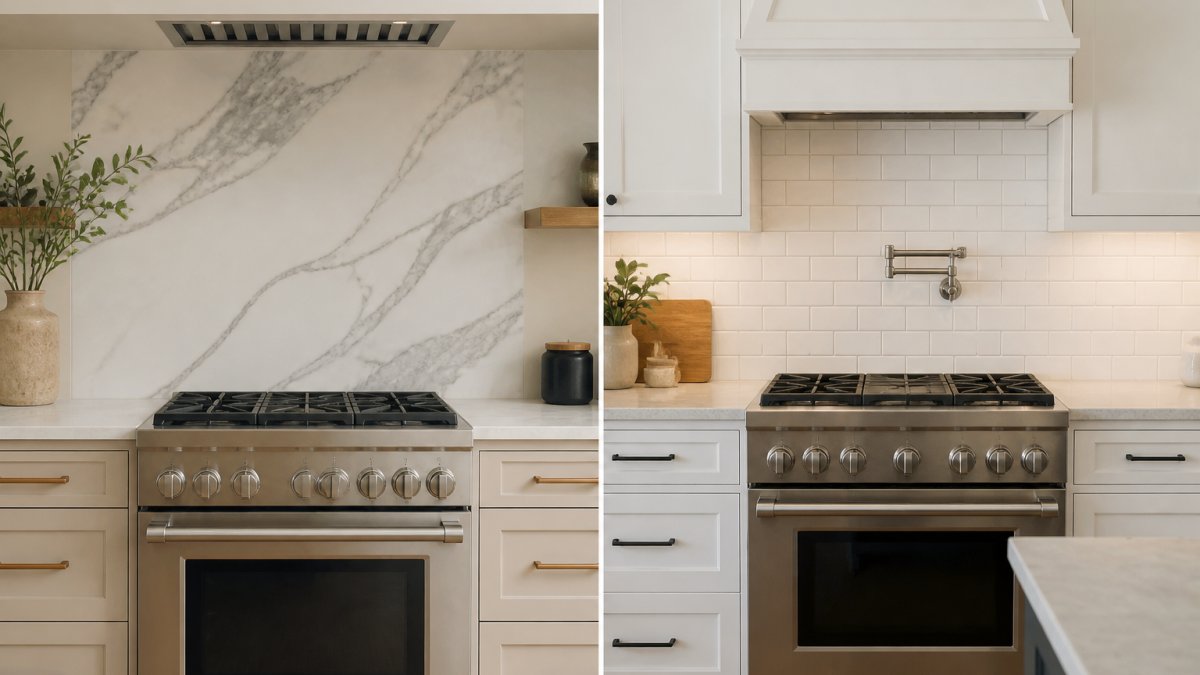
Where slab wins and where tile still makes sense
Slab wins on:
- Visual continuity. Veining runs unbroken from counter to cabinet.
- Easy cleaning. No grout lines to scrub grease out of.
- A luxury look. One panel reads as custom work.
- Fewer joints. Less chance of staining along seams.
Tile still makes sense when:
- Your budget is tight.
- You want a busy pattern or a handmade look.
- Your walls are badly out of square.
- You plan to change the design again in a few years.
The National Kitchen & Bath Association tracks how material choices shape kitchen design, and the pattern holds: slab costs more up front, but buyers notice it.
Slab Backsplash Materials: Performance, Pros and Cons
Four materials cover most slab backsplash projects, but treating them as interchangeable is the most common selection mistake. Each behaves differently during fabrication, installation, daily use, and repair. The table below is a starting point; the notes after it are what actually drive the decision.
Natural stone, quartz, porcelain, and glass compared
| Material | Heat Resistance | Stain Resistance | Sealing Needed | Fabrication Difficulty | Typical Repair Path | Best For |
|---|---|---|---|---|---|---|
| Natural stone (marble, granite, quartzite) | High | Medium (marble) to High (granite, quartzite) | Yes, on a schedule | Moderate to high; veins and fissures guide cuts | Professional re-polish or patch; etching is permanent | Traditional and luxury kitchens |
| Quartz | Medium | High | No | Moderate; consistent slabs cut predictably | Professional patch or replacement panel | Busy family kitchens |
| Porcelain | High | High | No | High; chipping risk at edges and cutouts | Difficult; chipped edges usually mean replacement | Modern, low-maintenance builds |
| Glass | Medium | High | No | Moderate; cutouts and edges need specialty handling | Panel replacement | Minimalist aesthetics |
Natural stone. Marble gives soft veining and a luxury look, but it etches from acids (lemon, vinegar, wine) and stains if you skip sealing.
Quartz. Engineered from ground stone and resin, quartz resists stains well and needs no sealing.
Porcelain. Porcelain slabs mimic stone closely and shrug off heat, stains, and moisture.
Glass. Glass slabs deliver a clean, minimalist aesthetic.
Installation and care by material
Selection does not end at the showroom. Plan for these material-specific steps before you order:
- Natural stone: Seal on a schedule (frequency depends on the stone and use), wipe up oil and acid fast, and use a pH-neutral cleaner. Re-seal test: a drop of water should bead, not soak in.
- Quartz: Wipe with mild soap and water. Use a trivet under hot pans. Avoid harsh solvents that can dull the resin.
- Porcelain: Clean with a damp cloth. Avoid abrasive pads on polished faces. Inspect edges at cutouts during installation, since chips are the main failure mode.
- Glass: Use a glass cleaner and a soft cloth. Skip scouring pads. Plan outlet cutouts carefully, as edge damage is hard to hide.
Grease and cooking products build up fastest behind the range. Wipe that zone weekly, whatever the material. The U.S. Environmental Protection Agency offers guidance on safe indoor cleaners if you want to avoid harsh products.
How to Match Backsplash With Countertop and Cabinets
Start with the countertop, then pull the backsplash toward it. Matching a backsplash with a countertop works best when the two share a color family but differ in intensity. A quiet countertop lets a dramatic slab carry the room.
A few rules to consider:
- Same stone, book-matched. Cut the backsplash from the same slab as the counter for a seamless look.
- Tone, not twin. Pick a backsplash one shade lighter or darker than the counter.
- Cabinet color sets the contrast. White cabinets free you up for bold veining. Dark cabinets want a calmer slab.
- Sample under real light. Kitchen lighting changes how a color scheme reads.
If your countertop color is warm, a cool gray slab will fight it. Bring samples home and look at them at night with the lights on.
Kitchen Slab Backsplash Ideas for Modern and Traditional Spaces
Style should drive the slab, not the other way around. A modern kitchen rewards big, quiet panels with tight veining. A traditional kitchen handles warmer stone, visible texture, and a full-height run to the hood.
Ideas worth borrowing:
Call the Expert Renovation Contractors Now →
- Full-height marble-look porcelain behind the range for a modern kitchen.
- Book-matched stone mirrored at the centerline for a dramatic focal point.
- Honed granite for a traditional kitchen that sees heavy cooking.
- A slab that stops at the upper cabinets for a partial-height, budget-friendly look.
Measurements, Layout, and Fabrication: Full-Height vs Partial Coverage
Measure twice, cut once, and order the slab before demolition. Fabrication is where slab projects succeed or fail.
Full-height coverage runs from counter to cabinet or ceiling. It needs more material, careful template work, and outlets planned around seams. Partial coverage stops at the upper cabinets and costs less.
Key steps:
- Template the wall after cabinets are set.
- Plan outlet and switch cutouts before cutting.
- Decide seam placement, then match veining across seams.
- Dry-fit the slab before final install.
Installed Cost, Budgeting, and Slab Selection
Pricing depends on the material, the square footage, fabrication complexity, and your local labor rates, so we quote each project rather than publish a single number. What we can do is show you the cost structure, because most budget surprises come from line items homeowners did not know to expect.
What drives the installed cost
Budget for these components separately:
- Slab material. Priced per square foot of slab, not per square foot of wall. A full-height backsplash can consume a large share of a slab, and leftover material is often unusable for other projects.
- Templating. A technician measures the installed cabinets and wall after they are set. This step is not optional and is priced as a service.
- Fabrication and cutting. Edge polishing, outlet and switch cutouts, seam placement, and vein matching all add labor. Complex layouts cost more than a single straight run.
- Installation labor. Full-height coverage, plumbing or electrical moves, and difficult wall conditions increase labor.
- Removal and disposal. Tearing out an old backsplash and hauling it away is a separate line item.
A partial-height slab that stops at the upper cabinets uses less material and fewer cutouts than a full-height run to the ceiling, so it is the most reliable way to control cost without changing the look of the room.
Slab selection and vein matching
Selecting the slab is a separate skill from selecting the material:
- Inspect the full slab, not a sample. Veining and pattern shift across a panel, and the piece you approve should be the piece that gets cut.
- Plan vein direction. Decide whether veins should run vertically, horizontally, or book-matched at a centerline before fabrication begins.
- Account for variation. Natural stone varies between slabs; if you need two panels, ask whether they come from the same block.
- Coordinate with the countertop. If the backsplash and countertop share a slab, plan both cuts together to reduce waste and match veining across the seam.
To keep costs in check:
- Choose partial height where the design allows.
- Pick porcelain if you want stone looks without stone care.
- Reuse the same slab for counter and backsplash to cut waste.
- Get the quote in writing before you commit, with material, fabrication, and installation listed separately.
For current pricing on your project, reach out to B&G Home Improvement Inc. for a quote.
Cleaning, Sealing, and Long-Term Care by Material
Care depends on the material, and getting it wrong shortens the life of the slab.
- Natural stone: Seal on a schedule, wipe up oil and acid fast, use a pH-neutral cleaner.
- Quartz: Wipe with mild soap and water. Use a trivet under hot pans.
- Porcelain: Clean with a damp cloth. Avoid abrasive pads on polished faces.
- Glass: Use a glass cleaner and a soft cloth. Skip scouring pads.
Grease and cooking products build up fastest behind the range. Wipe that zone weekly, whatever the material. The U.S. Environmental Protection Agency offers guidance on safe indoor cleaners if you want to avoid harsh products.
Conclusion: A Decision Checklist for Your Slab Backsplash
Use this checklist before you order a single slab:
- Confirm slab versus tile fits your budget and timeline.
- Pick a material by heat and stain performance, not looks alone.
- Match backsplash to countertop and cabinet color under real light.
- Choose full-height or partial coverage.
- Template and dry-fit before cutting.
- Plan a cleaning and sealing routine by material.
Picking the right slab backsplash is a design call and a fabrication call at once. That is exactly where a skilled remodeling team earns its keep. B&G Home Improvement Inc. brings locally owned craftsmanship, an in-depth consultation to match your taste and budget, and work built to last. Call our expert renovation contractors to plan your kitchen with confidence.
Frequently Asked Questions
What is the best material for a kitchen slab backsplash?
There is no single best material, but quartz and porcelain offer the lowest maintenance because they resist stains and do not need sealing. Natural stone such as marble and granite brings unique veining and a luxury look, but marble etches from acids and both stone types need periodic sealing. For heat resistance near a range, porcelain and granite handle direct heat better than quartz. Choose based on how much upkeep you accept, your countertop material, and whether you want a one-of-a-kind pattern or a consistent look.
Are slab backsplashes easier to clean than tile?
Yes, in most kitchens. A slab backsplash has few or no grout lines, so grease and cooking splatter wipe away from a flat surface. Tile requires scrubbing grout, which traps grease over time. The trade-off is that some slab materials need sealing: marble, granite, and other natural stone should be sealed periodically to resist stains. Quartz and porcelain typically only need a damp cloth and mild soap. In a heavy-cooking kitchen, fewer seams and grout lines make daily cleaning noticeably faster.
How thick should a kitchen slab backsplash be?
Most slab backsplashes are fabricated at 2 centimeters (about 3/4 inch) or 3 centimeters (about 1 1/4 inches) to match the countertop edge. A 2 cm slab is lighter and often less expensive, while 3 cm gives a bolder, more substantial look and can span taller sections with less visible support. Your fabricator will confirm the thickness based on slab availability, wall conditions, and whether the backsplash continues up to the upper cabinets or the ceiling.
Should the backsplash be lighter or darker than the countertop?
Either can work, but the choice depends on the cabinet color and the mood you want. A backsplash lighter than the countertop brightens the kitchen and makes small spaces feel larger. A darker backsplash adds depth and makes light countertops stand out. The safest approach is to pull one color from the countertop's veining or from the cabinets, so the three surfaces read as a coordinated color scheme rather than competing patterns. Bring real samples to the showroom and view them under your kitchen lighting.
A slab backsplash rewards careful planning and punishes shortcuts. If you want a showstopping kitchen that holds up over time, B&G Home Improvement Inc. can guide the material choice, the layout, and the install from first measurement to final seal. Our team offers clear communication, budget-friendly planning, and attention to detail on every project. Get started with B&G Home Improvement Inc. and build a kitchen you will love for years.