
Table of Contents
- Basement Flood Cleanup Safety Precautions Before You Enter
- Step 1: Stop the Water Source and Assess the Damage
- Step 2: Remove Standing Water with a Wet-Dry Vacuum or Sump Pump
- Step 3: Remove Wet Materials, Debris, and Mud
- Step 4: Dehumidify and Improve Air Circulation
- How Long to Dry Out a Flooded Basement
- Step 5: Sanitize, Disinfect, and Prevent Mold Growth
- When to Get an Emergency Disaster Restoration Service Quote
- Frequently Asked Questions
Last Updated: September 26, 2026
Basement Flood Cleanup Safety Precautions Before You Enter
Water in your basement is not just a mess. It is a hazard. Every year, homeowners get hurt because they rush into a flooded space without checking for danger first. This guide walks you through how to dry out flooded basement safely, step by step.
Electrical Hazards and Shutoff Protocols
The top danger in any flooded basement is electricity. Water conducts current, so a live circuit plus a wet floor equals shock risk.
Personal Protective Equipment Checklist
Floodwater carries sewage, chemicals, and bacteria. Protect your skin, eyes, and lungs before you start.
- Rubber boots with non-slip soles
- Waterproof gloves
- N95 respirator or P100 mask
- Safety goggles
- Long pants and long sleeves
- Hard hat if ceilings sag or debris falls
Step 1: Stop the Water Source and Assess the Damage
You cannot dry anything until the water stops coming in. Find the source before you haul out a single bucket.
Next, assess the damage. Check these areas:
- Water depth and the high-water mark
- Which materials got wet: drywall, carpet, insulation
- Whether sewage is present (it smells and looks dark)
- Structural cracks or sagging floors
Step 2: Remove Standing Water with a Wet-Dry Vacuum or Sump Pump
Standing water is your first target. The faster you remove it, the less damage spreads into your walls and floors.
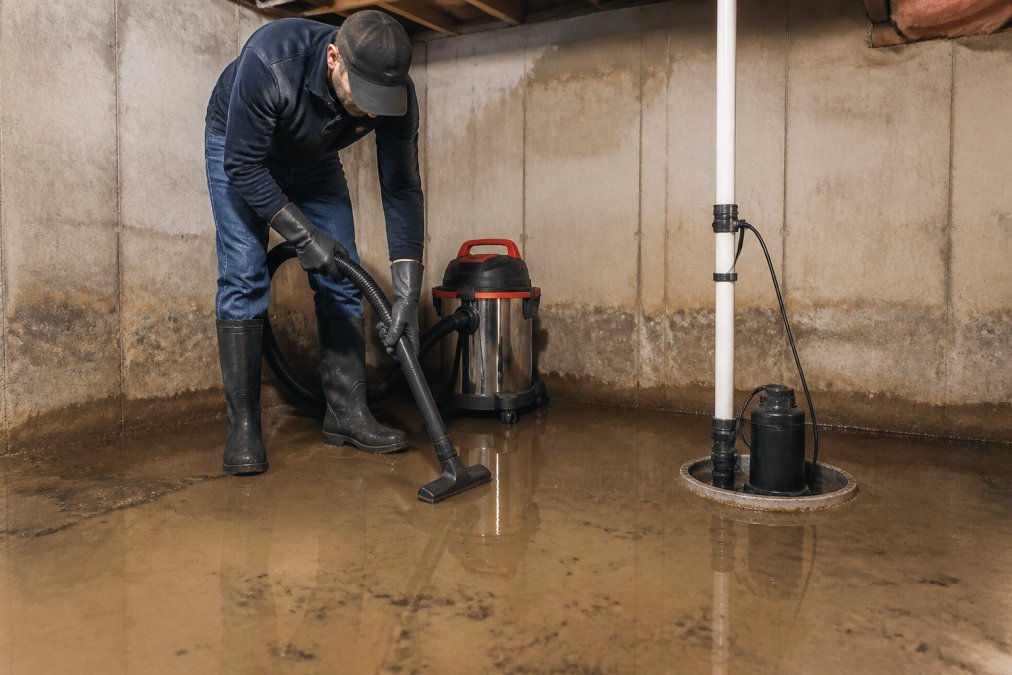
Follow this order:
- Pump out the bulk of the water first
- Use the wet-dry vacuum for the remaining shallow water
- Empty the vacuum tank often to keep suction strong
- Dump the water far from your foundation
Step 3: Remove Wet Materials, Debris, and Mud
Anything porous that soaked up floodwater usually has to go. Porous materials hold moisture and feed mold.
Toss these items if they got wet:
- Carpet and carpet padding
- Drywall up to the water line
- Insulation
- Cardboard boxes and paper
- Upholstered furniture
Step 4: Dehumidify and Improve Air Circulation
Moisture hides in wood, concrete, and drywall long after the puddles are gone. You have to pull it out of the air and the surfaces.
Set up these tools:
- Dehumidifiers to pull moisture from the air
- Air movers or fans to keep air flowing
- Open windows and doors when the outside air is dry
How Long to Dry Out a Flooded Basement
Most basements take two to five days to dry fully with proper equipment. The exact time depends on how deep the water got and what materials were soaked.
Call the Expert Renovation Contractors Now →
Here is a quick guide:
| Water Level | Typical Dry Time | Key Factor |
|---|---|---|
| Shallow, concrete only | 2-3 days | Good air flow |
| Carpet and pad soaked | 3-5 days | Pad removed |
| Drywall and insulation wet | 5-7 days | Wall cavities opened |
| Sewage contamination | 7+ days | Full sanitization |
Step 5: Sanitize, Disinfect, and Prevent Mold Growth
Mold can begin colonizing wet drywall, framing, and carpet within 24 to 48 hours of a flood. Sanitizing is not a finishing touch, it is a timed step that has to happen while the structure is still drying.
Clean first, disinfect second
Disinfectant does not work through dirt. Mud, silt, and organic film shield bacteria and mold spores from the chemical, so the order matters:
- Remove debris and mud. Shovel or scoop solids into heavy-duty bags. Do not hose mud into a floor drain, it clogs drains and can back up into the basement again.
- Wash hard surfaces. Scrub concrete, framing, and baseboards with warm water and a mild detergent. Rinse with clean water.
- Disinfect. Apply a disinfectant rated for the surface and let it dwell for the full contact time on the label. Rinsing too soon defeats the purpose.
- Dry. Keep air movers and the dehumidifier running through and after disinfection. Residual moisture reactivates mold.
Choosing a disinfectant
- Plain household bleach (unscented, no splashless additives): Mix 1 cup of bleach into 1 gallon of water for general floodwater cleanup. Use it on concrete, glass, and metal. Do not mix with ammonia, vinegar, or any other cleaner, the fumes are toxic. Bleach corrodes metal fasteners and dulls some finishes, so rinse metal after the contact time.
- Quaternary ammonium products: Often sold as 'disinfectant cleaner' or 'hospital-grade disinfectant.' Gentler on metal and longer-lasting residual than bleach. Follow the label dilution.
- EPA-registered mold and mildew products: Use these on framing and wall cavities where mold has already started. Look for an EPA registration number on the label, that number means the product has been reviewed for the claim on the bottle.
- Vinegar and 'natural' remedies: Fine for light surface cleaning, but not a substitute for a registered disinfectant after a sewage-contaminated flood.
Sewage-contaminated water changes the rules
If the floodwater carried sewage, you will know by the smell, the dark color, or a backup from a floor drain or toilet, the cleanup standard is higher:
- Porous materials that touched the water (carpet, pad, drywall, insulation, upholstered furniture, cardboard) cannot be reliably disinfected. They go in the trash.
- Hard surfaces need a stronger bleach solution and a longer contact time. Many restoration crews use 1.5 cups of bleach per gallon for Category 3 (black water) cleanup.
- Wear the full PPE kit, N95 or P100 respirator, goggles, waterproof gloves, rubber boots, for the entire job, not just the wet phase.
- Wash your hands and forearms with soap and warm water when you take a break, and shower when you finish for the day.
Verifying the space is actually dry
Touch is not a test. A surface can feel dry and still hold enough moisture to feed mold.
- Use a pin-type or pinless moisture meter on framing, subfloor, and drywall. Readings should return to the baseline you recorded in an unaffected part of the house before you call the job done.
- Target indoor relative humidity below 50%. A cheap hygrometer from a hardware store is enough to track it.
- Keep the dehumidifier and air movers running for at least 24 hours after the meter reads dry. The last bit of moisture hides in the wall cavity and under the slab.
Disposing of water-damaged materials
How you throw things away matters, and the rules are local.
- Bag it. Bag or wrap porous debris so it does not shed mold spores through the house on the way out.
- Check your municipality. Many cities and counties require flood-damaged drywall, carpet, and insulation to go to a specific transfer station or to be separated from regular trash. Some run special bulky-item or storm-debris pickups after a flood event.
- Appliances and electronics. Refrigerators, freezers, and anything with refrigerant or a compressor usually cannot go in normal curbside trash. Your county's solid waste department will have a drop-off or pickup process.
- Hazardous items. Paint, solvents, and yard chemicals that were submerged go to a household hazardous waste facility, not the curb.
- Do not burn it. Open burning of flood debris is banned or restricted in most jurisdictions and releases mold spores and chemical residue into the air.
Preventing the next flood
Sanitizing fixes this flood. The next step is making sure it does not happen again:
- Clear gutters and downspouts, and extend downspout discharge at least 6 feet from the foundation.
- Regrade soil so it slopes away from the house.
- Seal cracks in the foundation wall and floor with hydraulic cement or an epoxy injection kit.
- Test your sump pump before storm season, and add a battery backup if you do not have one.
- Consider a backwater valve on the sewer line if your flood came from a drain backup.
When to Get an Emergency Disaster Restoration Service Quote
Some floods are too big to handle alone. If water covers a large area, or sewage is involved, call a pro.
- Deep water across the whole basement
- Sewage contamination
- Sagging ceilings or cracked foundation walls
- Mold spreading across walls and floors
- Water that keeps coming back
Frequently Asked Questions
What pulls moisture out of a basement after a flood?
A combination of equipment works best. A wet-dry vacuum removes standing water first, then a dehumidifier pulls remaining moisture from the air. Air movers and fans keep air circulating so damp surfaces dry faster. Open windows and doors when outdoor humidity is low, but keep them closed if it's raining or humid outside. Run the dehumidifier continuously, emptying the tank or routing the hose to a drain, until moisture levels return to normal.
How long does it take to dry out a flooded basement?
Most basements take three to seven days to dry completely with proper equipment, depending on how much water entered, the humidity level, and how many porous materials got soaked. Drywall, carpet, and insulation hold water longer than concrete. If you're running a dehumidifier and air movers around the clock, you can shorten the timeline. Check moisture levels daily with a meter. If surfaces still feel damp after a week, call a professional.
Will homeowners insurance cover a flooded basement?
It depends on the cause. Sudden plumbing failures, burst pipes, and appliance leaks are typically covered under standard homeowners policies. Flooding from rising water, storm surge, or surface water usually requires a separate flood insurance policy through the National Flood Insurance Program or a private insurer. Document everything with photos and receipts before you start cleanup, and contact your adjuster early to confirm what's covered.
What safety gear do I need for basement flood cleanup?
At minimum, wear waterproof boots, heavy work gloves, and eye protection. If the water may contain sewage or chemicals, add an N95 or P100 respirator and full-coverage clothing. A hard hat helps if ceiling materials are sagging. Never enter standing water without confirming the power is off to the basement. If you smell gas or see exposed wiring, leave immediately and call a professional before doing any cleanup work.
Comments